Users And Authentication

The Users and Authentication section manages who can access ArkBox and what they are allowed to do.
Pages In This Section
| Page | Purpose |
|---|---|
| Users | Manage individual user accounts. |
| Groups | Organize users into collections. |
| Roles | Define permission sets. |
| LDAP | Connect ArkBox to an external directory service. |
Users
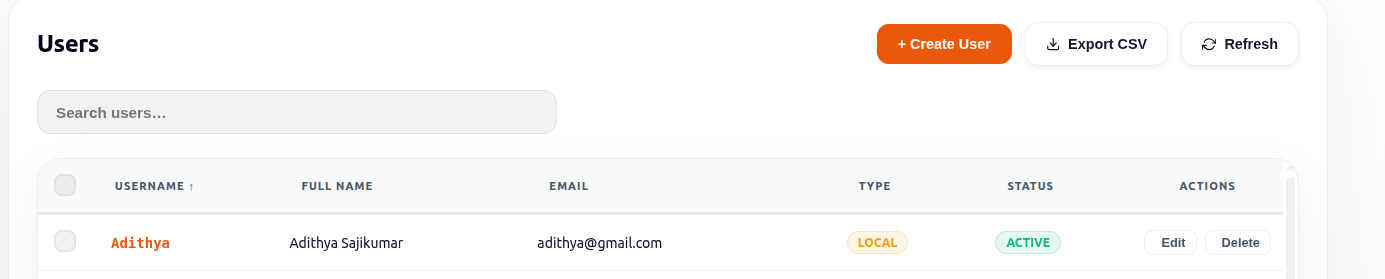
The Users page lists all user accounts in ArkBox.
The table can show username, full name, email address, mobile number, account type, and account status.
Administrators can search users, create users, edit user details, manage user status, delete users when appropriate, export CSV data, refresh the table, and perform actions on multiple selected users.
Create A User
- Open Admin.
- Open Users and Authentication.
- Select Users.
- Select Create User.
- Enter the required user details.
- Assign the correct role or group if the form requires it.
- The Arkbox Users group is assigned by default for all new users.
- Additional groups can be selected if required.
- Selecting a group automatically applies its predefined roles.
- Save the user.
- Confirm the user appears in the table.
Edit A User
Administrators can update existing user information.
When editing a user, administrators can:
- Update user details.
- Change group assignments.
- Activate or deactivate the user.
- Set a new password if required.
Changes are applied after saving the user.
User Status
Users can have either of the following statuses:
- Active
- Inactive
Administrators can activate or deactivate users from the Users page.
Selecting Multiple Users
Use the checkboxes beside user records to select one or more users.
After selecting users, available actions may include:
- Activate
- Deactivate
- Delete
- Cancel selection
Available actions depend on the selected users.
Note: If LDAP users are included in the selection, deletion may be unavailable until the LDAP users are removed from the selection.
Groups
Groups organise users into logical collections so access can be managed more easily. Use groups for departments, project teams, role-based work groups, or LDAP-synced collections.
| Field | Meaning |
|---|---|
| Group Name | The name of the group. |
| Users | Number of users in the group. |
| Roles | Roles assigned to the group. |
| Permissions | Permission count available through the group roles. |
| Description | Notes about the group's purpose. |
| System | Indicates whether the group is system-generated. |
Create A Group
- Open Groups.
- Select Add Group.
- Enter a clear group name.
- Add a description when helpful.
- Assign users and roles if available.
- At least one role must be selected before the group can be created.
- Users can be assigned to the group during creation.
- Save the group.
Edit A Group
Existing groups can be updated to manage user membership and role assignments.
- Open Groups.
- Select the group to manage.
- Update the required information.
- Save the changes.
Note: For system-generated groups, only the user list can be modified. Other group information is read-only. For non-system-generated groups, the group name cannot be changed after creation. Other available group settings can be updated.
Roles
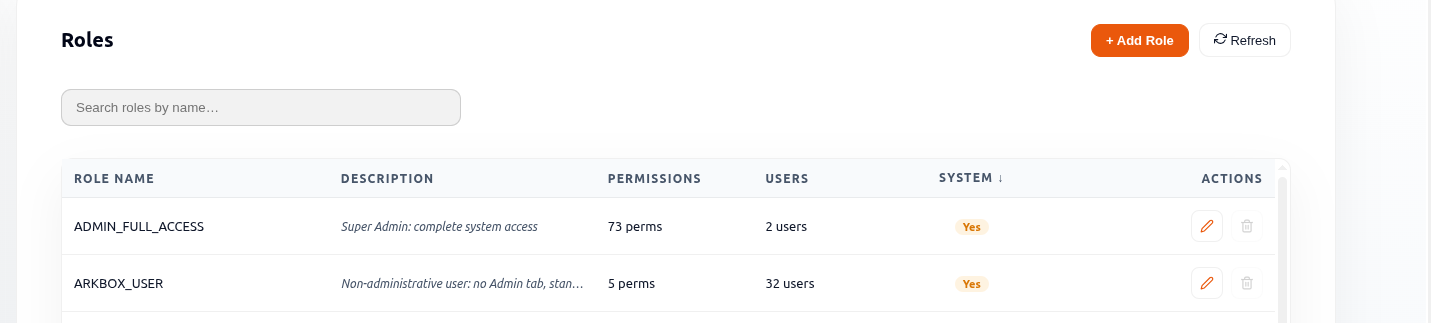
Roles define what actions users can perform. Examples include Admin, Viewer, Project Manager, Project Officer, and HR Manager.
Administrators can create roles, assign permissions, review role usage, and manage user-created roles. System-generated roles are available for reference but cannot be modified or deleted.
| Field | Meaning |
|---|---|
| Role Name | Name of the role. |
| Description | Brief explanation of the role's purpose. |
| Permissions | Number of permissions assigned to the role. |
| Users | Number of users currently assigned to the role. |
| System | Indicates whether the role is system-generated. |
Create A Role
- Open Roles.
- Select Add Role.
- Enter the role name.
- Add a description if needed.
- Select the permissions that match the user's responsibilities.
- At least one permission must be selected before the role can be created.
- Save the role.
- Assign the role to users or groups.
Edit A Role
- Open Roles.
- Select the edit option for the role.
- Update the required information or permissions.
- Save the changes.
Note: System-generated roles are read-only and cannot be modified.
Delete A Role
- Open Roles.
- Select the delete option for the role.
- Confirm the deletion.
Note: Only user-created roles can be edited or deleted.
LDAP
LDAP connects ArkBox to an external directory service for centralized authentication.
| Field | Purpose |
|---|---|
| Enable LDAP Integration | Turns LDAP authentication on or off. |
| Domain Name | Directory domain used for authentication. |
| Server FQDN / IP | LDAP server hostname or IP address. |
| Mode | Connection mode used by the server (LDAP or LDAPS). |
| Detected Port | Port used for the LDAP connection. |
| Base DN | Directory search base used to locate users and groups. |
| Bind DN | Account used to connect and query the directory. |
| Password | Password for the Bind DN account. |
Configure LDAP
- Open LDAP.
- Enable LDAP integration.
- Enter the domain and server details.
- Enter the Base DN and Bind DN information.
- Enter the bind account password.
- Select Test Configuration.
- Verify the connection is successful.
- Select Save Changes.
- Use Fetch Users & Groups when directory users and groups need to be synchronized.
A successful configuration displays a connection success message indicating that the LDAP server and Base DN were validated successfully.
Sync Log Retention
LDAP synchronization logs can be retained and archived for a configurable period.
| Field | Purpose |
|---|---|
| Retention (Days) | Number of days to keep synchronization logs before compression. |
| Archive (Days) | Number of days to keep archived log files before deletion. |
To update log retention settings:
- Enter the retention period.
- Enter the archive period.
- Select Save Log Settings.
Good Practices
- Create groups around teams or responsibilities, not individual exceptions.
- Assign roles through groups where possible.
- Keep role names simple and meaningful.
- Disable or remove accounts when users no longer need access.
- Test LDAP before saving changes.