Project Settings
Project Settings define the project categories, statuses, lifecycle stages, and governance rules used across ArkBox Project Management.
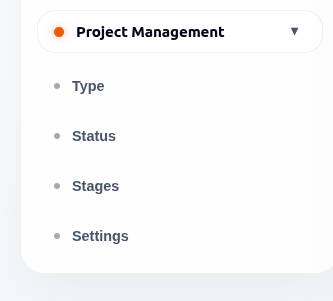
Pages In This Section
| Page | Purpose |
|---|---|
| Type | Define project categories. |
| Status | Define progress states. |
| Stages | Define project lifecycle phases. |
| Settings | Configure project governance rules. |
Project Types
Project types categorise projects so teams can organise, filter, and report on work more effectively.
| Field | Meaning |
|---|---|
| Name | Name of the project type. |
| Scope | Category associated with the project type. |
| System | Indicates whether the type is system-defined or user-defined. |
Create A Project Type
- Open Admin.
- Open Project Management.
- Select Type.
- Select Add Project Type.
- Enter the type name.
- Select the category or scope.
- Create the type.
System-defined types may be protected and unavailable for editing.
Edit A Project Type
- Open Type.
- Select the project type to manage.
- Update the project type information as needed.
- Select Update to save the changes.
Delete A Project Type
- Open Type.
- Select the project type to manage.
- Select Delete.
- Confirm the deletion when prompted.
Type Management Rules
- System-defined project types are read-only and cannot be updated or deleted.
- User-defined project types can be updated when required.
- User-defined project types can be deleted when they are no longer needed.
Project Statuses
Project statuses describe the current state of work. Examples include Open, In Progress, and Completed.
Statuses can apply to different scopes, such as Project, Language, Book, Chapter, and Verse.
| Control | Meaning |
|---|---|
| Default Status | Applied automatically when new work starts. |
| Closed Status | Marks work as complete. |
| Scopes | Determines where the status can be used (Project, Language, Book, Chapter, or Verse). |
| System | Indicates whether the status is system-defined or user-defined. |
Create A Project Status
- Open Status.
- Select Add Project Status.
- Enter the status name.
- Select the applicable scopes.
- Mark default or closed behavior if needed.
- Save the status.
Status Requirements
- A status must have at least one applicable scope selected.
- A status can be assigned to one or more scopes such as Project, Language, Book, Chapter, or Verse.
Edit A Project Status
- Open Status.
- Select the status to manage.
- Update the status information as needed.
- Select Update to save the changes.
Delete A Project Status
- Open Status.
- Select the status to manage.
- Select Delete.
- Confirm the deletion when prompted.
Status Management Rules
- Only one status can be designated as the Default Status at a time.
- The Default Status cannot be deleted.
- Multiple statuses can be marked as Closed Statuses.
- At least one Closed Status must exist in the system.
- A Closed Status cannot be deleted if it is the only remaining Closed Status.
- Statuses may be system-defined or user-defined.
Status Priority
- Status display order can be adjusted using drag-and-drop or keyboard controls.
- Priority changes are saved automatically.
Project Stages
Stages represent lifecycle phases in project work. Examples include Planning, Execution, Review, Drafting, Consultant Checking, Formatting, and Publishing.
| Field | Meaning |
|---|---|
| Stage Name | Name of the project stage. |
| Description | Optional details explaining the purpose of the stage. |
| System | Indicates whether the stage is system-generated or user-defined. |
Create A Stage
- Open Stages.
- Select Add Project Stage.
- Enter the stage name.
- Add an optional description.
- Save the stage.
Edit A Stage
- Open Stages.
- Select the stage to manage.
- Update the stage name or description as needed.
- Select Update to save the changes.
Delete A Stage
- Open Stages.
- Select the stage to manage.
- Select Delete.
- Confirm the deletion when prompted.
Stage Management Rules
- System-generated stages can be updated but cannot be deleted.
- User-defined stages can be updated and deleted.
- Stage descriptions are optional.
Settings
| Setting | Purpose |
|---|---|
| Project Management Admins | Users with broad control over project configuration. Multiple users can be selected. |
| Project Management Officer | User responsible for oversight and execution. |
| Date Format | Standard date display used in project screens. |
| Check-In Requirement | Requires check-in before status updates when enabled. |
Available Date Formats
The following date formats are available:
- YYYY-MM-DD
- DD/MM/YYYY
- MM/DD/YYYY
- DD MMM YYYY
- MMM DD, YYYY
- YYYYMMDD
Configure Project Settings
- Open Settings.
- Assign project management admins.
- Select the project management officer.
- Choose the date format.
- Configure check-in rules.
- Save Settings.
Notes
- The Save Settings button becomes enabled only when changes are made.
- If no changes are made, the Save Settings button remains disabled.
Good Practices
- Define statuses before teams begin updating project work.
- Keep stages aligned with real team workflow.
- Use clear stage names that project members understand.
- Review check-in rules with project teams before enforcing them.