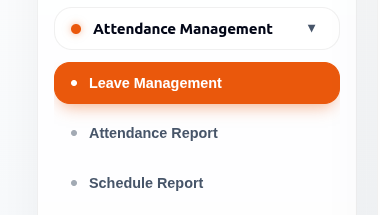
Attendance Management
Attendance Management helps administrators define organisational leave policies, configure weekly working hours, manage annual holidays and company closures, review attendance records, and automate attendance reporting.
This section is focused on organisation-level attendance and leave policy configuration, not individual leave applications such as Sick Leave requests.
Pages In This Section
| Page | Purpose |
|---|---|
| Leave Management | Configure organisation leave policies, weekly working hours, and annual holidays or closures. |
| Attendance Report | Review attendance across users and dates. |
| Schedule Report | Automate attendance report delivery. |
Leave Management

Leave Management is used to configure organisation-wide leave policies, working schedules, annual holidays, and company closures.
This section helps organisations define:
- Official leave categories
- Weekly working hours
- Company holidays
- Non-working days
- Organisational closure schedules
It is not used for individual employee leave applications.
Available Actions
The Leave Management page includes:
- Year filter
- Search box
- Add Leave Policy button
- Refresh button
The Search box can be used to locate leave policies by name or description.
The Refresh button reloads the latest leave policy information.
Organisational Leave Policies
Leave types are used to define organisation-level leave categories, such as:
- Annual Leave
- Casual Leave
- Public Holiday
- Company Holiday
- Emergency Leave
- Organization Shutdown
These policies help standardise attendance and HR operations across the organisation.
Leave Policy Years
Leave Policies are organised by year.
Each policy belongs to a specific year and is only displayed when that year is selected from the Year dropdown.
Users can:
- Select a year from the Year filter.
- View policies created for that year.
- Create separate leave policies for different years.
Example:
- 2026 Leave Policies
- 2027 Leave Policies
This allows organisations to maintain different working schedules and closure periods for different years.
Time Ranges
Time Ranges define the official weekly working hours for each day.
Example configurations may include:
- Monday to Friday working hours
- Weekend schedules
- Half-day work schedules
- Flexible organisational timings
These settings are used for:
- Attendance calculations
- Work-hour tracking
- Attendance reports
- Schedule validation
Close Times
Close Times define official non-working periods such as:
- Annual holidays
- Public holidays
- Festival holidays
- Company shutdown periods
- Organisation-wide leave days
These closures automatically affect attendance and reporting calculations.
Create A Leave Policy
- Open Leave Management.
- Select Add Leave Policy.
- Enter the Leave Policy name.
- Add an optional description.
- Select the applicable year.
- Save the leave policy.
After creation, the policy becomes available for configuration.
Manage Leave Policy
Selecting Edit opens the Manage Leave Policy window.
The management window contains three sections:
- Leave Details
- Time Ranges
- Close Times
Users can switch between these sections to configure the selected policy.
Copy Leave Policy
The Copy Policy feature allows users to create one or more copies of an existing leave policy.
When copying a policy, users can:
- Specify the number of copies.
- Provide a policy name for each copy.
- Add optional descriptions.
- Select the target year.
- Choose whether to copy:
- Time Ranges
- Close Times
This helps organisations quickly create similar leave policies without re-entering configuration details.
Delete Leave Policy
Users can remove a leave policy using the Delete action.
Before deletion, a confirmation dialog is displayed.
Deleting a leave policy permanently removes the policy configuration and cannot be undone.
Leave Details
The Leave Details section allows users to update:
- Leave Policy Name
- Description
- Year
Changes are saved using the Save button.
Time Range Information
Each time range contains:
- Day
- Start Time
- End Time
Multiple working schedules can be created for the selected policy.
Configured time ranges are displayed in a table where users can review existing schedules and remove unwanted entries.
Configure Weekly Working Hours
- Open the leave policy.
- Select Time Ranges.
- Choose a day of the week.
- Select the start time.
- Select the end time.
- Click Add.
- Review the added schedule.
- Save the configuration.
This defines the organisation’s official working schedule.
Close Time Information
Each Close Time entry includes:
- Name
- Start Date
- End Date
- Recurring option
- Notes
Close Times are displayed in a table for review and management.
Add Annual Holidays Or Company Closures
- Open the leave policy.
- Select Close Times.
- Enter the closure name.
- Select the start date.
- Select the end date.
- Choose whether the closure is recurring.
- Add optional notes.
- Click Add.
- Save the configuration.
This is commonly used for:
- National holidays
- Religious holidays
- Company shutdowns
- Weekend policies
- Annual organisation leave schedules
Attendance Report
The Attendance Report provides a grid-based view of employee attendance across the selected date range.
Users can:
- Search employees
- Sort attendance records
- Filter attendance data
- View attendance status by day
- Refresh attendance information
- Configure attendance settings
| Indicator | Meaning |
|---|---|
| P | Present |
| A | Absent |
| H | Half Day |
| O | Office Off |
| E | Extra Time |
| P/E | Present with Extra Time |
Attendance Report Controls
The Attendance Report includes the following controls:
Search Users
Use the Search Users field to locate specific employees.
Sort
Use the Sort option to organize attendance records.
Date Range
Use the Date Range selector to change the reporting period.
Examples shown in the interface include:
- Today
- This Week
Refresh
Use Refresh to load the latest attendance information.
Filter By
Use Filter By to narrow attendance records.
Available options shown in the interface include:
- All
- Projects
When Projects is selected, an additional project selector becomes available.
Review Attendance
- Open Attendance Report.
- Select a date range.
- Optionally search for a specific employee.
- Optionally apply a filter.
- Review employee rows and attendance status columns.
- Identify attendance, absence, half-day, office-off, and extra-time patterns.
- Refresh the report when updated attendance information is required.
Attendance data is calculated based on:
- Working hour policies
- Company closures
- Attendance logs
- Organizational schedules
Filter Attendance By Project
Attendance records can be filtered by project.
- Select Projects from the Filter By dropdown.
- Choose a project.
- Review attendance records for users associated with the selected project.
The attendance grid updates to display matching records.
Attendance Settings
Attendance Settings are used to configure attendance processing.
Settings can be accessed using the Settings button in the Attendance Report.
Attendance Not Configured
If no default leave policy has been selected, attendance reporting is unavailable.
The Attendance Report displays a notification indicating that attendance is not configured and prompts users to open Attendance Settings.
Default Leave Policy
Attendance reporting and Check In / Check Out functionality are enabled only after a default leave policy is selected.
Users can choose a leave policy from the available policies list.
Default Auto Checkout After Hours
Auto Checkout defines how many hours are added after the policy end time before an automatic checkout occurs.
Users can configure the number of hours according to organizational requirements.
Checkout Grace Minutes
Grace Minutes provide a buffer period after the policy end time before attendance is marked as extra time.
Users can configure the grace period according to organizational requirements.
Active Sessions Warning
When changing attendance settings, the system may display an Active Sessions warning.
The warning informs users that active check-in sessions may be automatically checked out before the new attendance configuration is saved.
Schedule Report

The Schedule Report feature allows users to create, manage, and send scheduled attendance reports.
Users can:
- Create report schedules
- Search scheduled reports
- Edit existing schedules
- Delete schedules
- Send reports manually
- Enable or disable schedules
- View upcoming report execution times
Scheduled reports can include:
- Report name
- Attendance report frequency
- Run time
- Filter configuration
- Recipient email addresses
- CC email addresses
- Enabled or disabled state
Schedule Report List
The Schedule Report page displays all configured schedules.
The list includes:
- Schedule Name
- Frequency
- Run Time
- Next Run
- Enabled Status
- Available Actions
Available actions include:
- Send
- Edit
- Delete
Search Schedules
Use the Search Schedules field to locate existing report schedules by name.
Create A Scheduled Report
- Open Schedule Report.
- Select Add New Report.
- Enter the report name.
- Select the attendance report frequency.
- Set the run time.
- Select a filter option.
- If filtering by project, select a project.
- Add recipient email addresses.
- Add CC recipient email addresses if required.
- Select whether the schedule is enabled.
- Save the schedule.
Filter Options
Scheduled reports can be generated using different filters.
Examples shown in the interface include:
- All Users
- By Project
When By Project is selected, a Project field becomes available for selecting a specific project.
Run Time And Next Run
Run Time and Next Run are displayed using the system timezone configured in Time Settings (NTP).
If the system timezone changes, the displayed Next Run time is updated according to the configured timezone.
Send A Scheduled Report
Use the Send action to manually send a scheduled report without waiting for the next scheduled execution.
Edit A Scheduled Report
Use the Edit action to modify an existing report schedule.
Users can update schedule settings and save the changes.
Delete A Scheduled Report
- Select Delete for the required schedule.
- Review the confirmation message.
- Select Delete to remove the schedule.
- Select Cancel to keep the schedule.
Schedule Status
Schedules can be enabled or disabled.
Enabled schedules continue to run according to their configured schedule.
Disabled schedules remain available in the list but do not run automatically.
Good Practices
- Configure organisational leave policies before reviewing attendance.
- Keep annual holiday and closure records updated.
- Leave Policies are organised by year.
- Review Time Ranges before configuring Close Times.
- Use Copy Policy when creating similar leave policies for a new year.
- Verify recurring holiday settings before saving.
- Configure accurate weekly working hours.
- Test SMTP settings before scheduling report delivery.
- Review scheduled report recipients periodically.
- Regularly verify attendance calculations against organisational policies.